
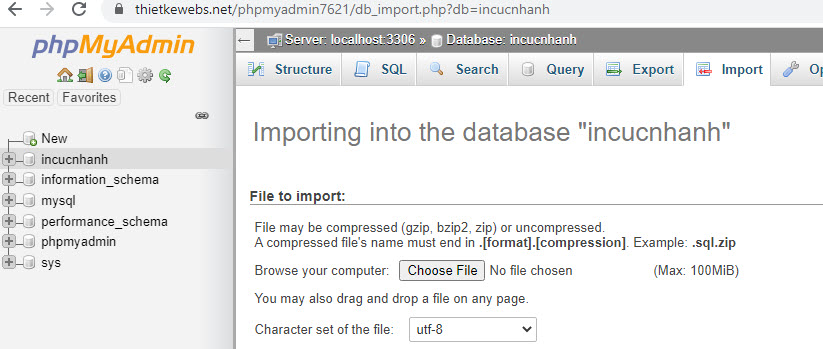
Lỗi không upload được database nặng trên phpmyadmin
Nội dung
Fix lỗi 413 Request Entity Too Large – File Upload Issue
Khi cài đặt server chắc các bạn gặp phải lỗi không up dc file database trong admin, ở bài viết này netweb sẽ hướng dẫn các bạn nhé!
Bước 1: First edit the Nginx configuration file (nginx.conf)
Vị trí
sudo nano /etc/nginx/nginx.confThêm code
http {
        client_max_body_size 100M;
}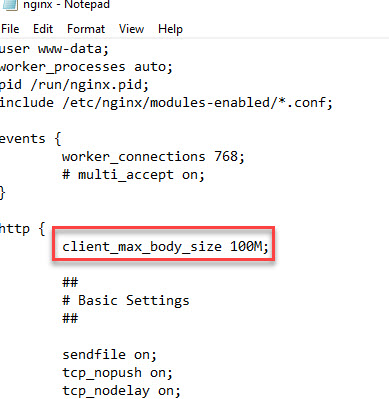
code full sẽ được như thế này:
user www-data;
worker_processes auto;
pid /run/nginx.pid;
include /etc/nginx/modules-enabled/*.conf;

events {
	worker_connections 768;
	# multi_accept on;
}

http {
	 client_max_body_size 100M;

	##
	# Basic Settings
	##

	sendfile on;
	tcp_nopush on;
	tcp_nodelay on;
	keepalive_timeout 65;
	types_hash_max_size 2048;
	# server_tokens off;

	# server_names_hash_bucket_size 64;
	# server_name_in_redirect off;

	include /etc/nginx/mime.types;
	default_type application/octet-stream;

	##
	# SSL Settings
	##

	ssl_protocols TLSv1 TLSv1.1 TLSv1.2 TLSv1.3; # Dropping SSLv3, ref: POODLE
	ssl_prefer_server_ciphers on;

	##
	# Logging Settings
	##

	access_log /var/log/nginx/access.log;
	error_log /var/log/nginx/error.log;

	##
	# Gzip Settings
	##

	gzip on;

	# gzip_vary on;
	# gzip_proxied any;
	# gzip_comp_level 6;
	# gzip_buffers 16 8k;
	# gzip_http_version 1.1;
	# gzip_types text/plain text/css application/json application/javascript text/xml application/xml application/xml+rss text/javascript;

	##
	# Virtual Host Configs
	##

	include /etc/nginx/conf.d/*.conf;
	include /etc/nginx/sites-enabled/*;
}


#mail {
#	# See sample authentication script at:
#	# http://wiki.nginx.org/ImapAuthenticateWithApachePhpScript
#
#	# auth_http localhost/auth.php;
#	# pop3_capabilities "TOP" "USER";
#	# imap_capabilities "IMAP4rev1" "UIDPLUS";
#
#	server {
#		listen     localhost:110;
#		protocol   pop3;
#		proxy      on;
#	}
#
#	server {
#		listen     localhost:143;
#		protocol   imap;
#		proxy      on;
#	}
#}
Bước 2: Chỉnh sửa trên NGINX Web Server
Ubuntu -> NGINX Example -> /etc/php/7.4/fpm/php.iniNow search your php.ini file for upload_max_filesize and post_max_size to update it as shown below.
# file upload size limit

; Maximum allowed size for uploaded files.
; http://php.net/upload-max-filesize
;upload_max_filesize = 2M
upload_max_filesize = 16

# post request size limit

; Maximum size of POST data that PHP will accept.
; Its value may be 0 to disable the limit. It is ignored if POST data reading
; is disabled through enable_post_data_reading.
; http://php.net/post-max-size
;post_max_size = 8M
post_max_size = 16M
After updating the maximum file size and post request size, restart the PHP FPM to apply the changes.
# Restart PHP FPM
sudo systemctl restart php7.4-fpm
Bài viết mới cập nhập
-

DANH SÁCH 34 TỈNH/THÀNH PHỐ CỦA VIỆT NAM SAU SÁT NHẬP 1/7/2025
1 năm trước, 54192 Lượt xemNăm 2025, Việt Nam dự kiến sẽ có 34 tỉnh, thành phố sau khi sắp xếp lại 63 tỉnh, thành hiện nay. Trong đó, có 6…
-

Cấu hình Newsletter gửi theo thời gian chỉ định
1 năm trước, 132 Lượt xemGIẢI PHÁP HOÀN HẢO: Chỉ vô hiệu hóa tất cả job, nhưng không chặn file wp-cron.php Cách làm: Bạn thêm đoạn sau vào functions.php hoặc…
-

21 câu lệnh Linux phải nhớ quản lý vps
1 năm trước, 517 Lượt xemĐây là những câu lệnh căn bản bất cứ ai muốn tìm hiểu về Linux cần phải nhớ. clear: làm sạch cửa sổ dòng lệnh…
-

Hướng dẫn quản lý web bán hàng 2 ngôn ngữ
3 năm trước, 476 Lượt xemXin chào các bạn! hôm nay netweb sẽ hướng dẫn các bạn quản lý web bán hàng 2 ngôn ngữ! Hướng dẫn tạo user thành…
-
Hướng dẫn tạo user thành viên và quản lý đơn hàng
3 năm trước, 504 Lượt xemTrong bài viết này, netweb sẽ hướng dẫn các bạn tạo user thành viên và đặt hàng quản lý đơn hàng trong WooCommerce Thêm mới…


Bình luận trên facebook netweb.vn